We, gardeners, do not like to say goodbye to the summer that gave us the wonderfully fresh and tasty things we grew. The tiny seeds we planted, nurturing the babies until they were teenagers and then gorging ourselves on the mature fruits of our labours, gave us an incredible year of superb tastes. Yet, we must tidy up so that we can repeat our love of nature and gardens for spring. Cleaning up and putting your garden to bed is not so bad—it’s cleaning up our outdoor home. This is traditional garden wisdom generation after generation. To give everything in nature a winter’s rest, we collected 5 best tips for fall garden cleanup.
As the summer growing season winds down, we need to do a few things to prep the garden soil for next year. We need to put tools away. We need to pull up plants, prune plants and more. It’s always nice to spruce up the garden to make the lawn area cleaner looking.
You can also use this time to make holes, scoop out the dirt, and plant some spring bulbs and fall season plants to fill in the spaces of your landscape. This will brighten up and add some beauty and color to your ending season garden.
It’s not too late in some regions to start a fall crop of snow peas, regular peas, radishes, spinach, green onions, and some other early springtime vegetables. But if you are finished with gardening for the year, you’ll miss out on some great crisp fall vegetables.
Table Of Contents
Fall Garden Cleanup for Spring Growing
1. Save Seeds
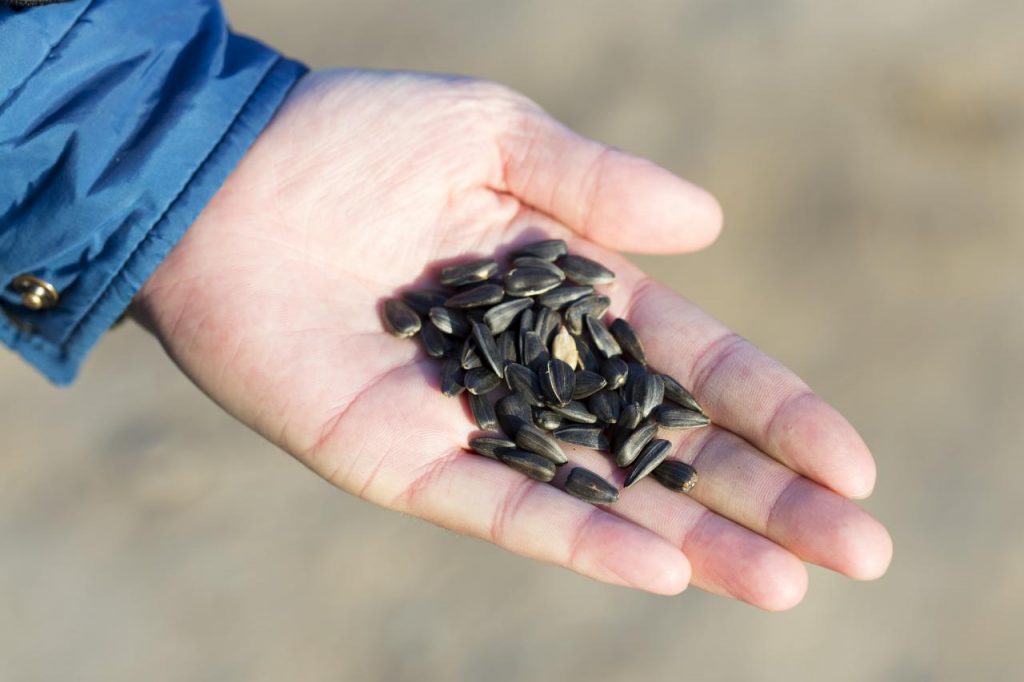
Saving seeds is saving money. They are no longer 10 cents a pack. The stars of your garden are annual flowers that only grow for one season. Save seeds and plant again next year. The unfussy perennial flowers will come back every year with their beauty under the sun or in the shade. Mature seeds are the ones to gather and they will be tan or brown and hard. Share your love of flowers with your friends by giving them some seeds.

Before you pull up your garden, see if you have green beans that have turned brown with big fat seeds inside. Gather them from your best plants. Seeds from unhealthy plants will pass the disease on next year. Take them in the house and let them dry on paper towels or newspaper in a cool, dry place. This will take a few weeks. Remove the seeds and let them dry for some more time in a jar or paper envelope. Do not put the lid on a jar because the seeds will mould and deteriorate from their own internal moisture. Put them in a jar, but leave the lid off so they can breathe. Check on them and let them sit until spring, then replant. Do the same with peas.
If you grew dill, prune off the stems, tie them together with twine and hang them upside down to dry. Be sure to put something under the heads to catch the seeds. You can replant the seeds in spring and use the seeds in your dill pickles and other dishes. When the dill starts to set seeds, they will no longer produce the feathery “leaves” that we call “dill weed” to put on fresh salmon and in salads or anywhere we love the lively dill flavour.
With heirloom tomatoes, you can save the seeds. Wash them and dry them on a paper towel. Do the same for them as green bean seeds. These tomato plants will be exact identical plants next year because they are not hybrids. They are the “parents” used to create hybrids. If you save your hybrid seeds, you will get a plant that is one of its parents, or they will be sterile. It’s not a good idea to save them. Hybrids are a blend of other tomatoes.
Leave some of your plants with their heady seeds for the birds’ dinner. After the frost, cut the heads and put in a dry place. In winter time, when the snow is on the ground, put them in your feeder or tray for the birds to find easily. Their favourite seed is a sunflower, but they will eat coneflowers, daises, coreopsis, and Black-eyed Susans seeds.
2. Cleanup Tips
One of the most important Fall Garden Cleanup tips is that, If your tomatoes had a virus where the leaves turned brown and crispy, you must destroy the dead plants by putting them in the trash. Do not put on the grass and have the lawn mower chop them up; the virus will get into the soil, and the virus usually comes from the soil initially.
Pull up leggy tomatoes, scorched and yellow zucchini leaves, and vines. Pull up onions and put them into a mesh bag similar to those orange bags holding potatoes made of fibres that breathe. Do not use plastic bags because anything in them will condensate, become mushy, stinky, and rot. You can also put them somewhere to dry naturally, but not on the grass or soil. A garage or basement floor works well.
Prune your summer blooming bushes, and trim back any flowers that will bloom again. Cut iris leaves with scissors about 3 inches above the ground into a fan shape and they will bloom in the spring around May.
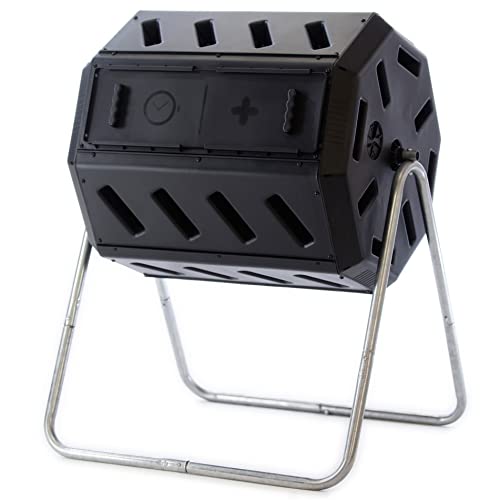
If you have a compost bin, put plants and grass clippings in there. Do not put tomato plants in your compost mix. With diseased or bug-infested plants, double bag them and put them in the trash.
| # | Preview | Product | Rating | Price | |
|---|---|---|---|---|---|
| 1 |

|
FCMP Outdoor IM4000 Dual Chamber Tumbling Composter Canadian-Made, 100% Recycled Resin - Outdoor... | No ratings yet |
$67.95 |
Buy on Amazon |
| 2 |

|
Large Garden Compost Bin, 80 Gallon (300L) Outdoor Composter Tumbler from BPA-Free Material for Fast... | No ratings yet | $33.98 | Buy on Amazon |
| 3 |

|
JupiterForce Garden Compost Bin 80 Gallon (300 L) from BPA Free Material, Large Composting Bin... | No ratings yet | $34.59 | Buy on Amazon |
| 4 |

|
Redmon 65 Gallon Outdoor Compost Bin with Snapping Lift Off Lid, 4 Door Access, and Multiple Vent... | No ratings yet | $74.99 | Buy on Amazon |
| 5 |

|
F2C Garden Compost Bin from BPA Free Material -80 Gallon(300 L) Large Compost Bin Aerating Outdoor... | 738 Reviews | $44.99 | Buy on Amazon |
| 6 |

|
Presto Products Compost Bin by GEOBIN | No ratings yet |
$35.99 |
Buy on Amazon |
If your tomatoes still produce fruit, prune out the suckers and tops so that the existing green ones will get bigger. The suckers suck up many nutrients, so get rid of them—they are worthless. Suckers are the small stems and leaves between the big leaves on the stem. You can use your green tomatoes by frying them, making a green tomato relish, or a green tomato pie that tastes like apple pie. The tomato plants will die with the first hard frost.
Remove all weeds before they put out their final bloom and make those unwanted seeds. You do not want those noxious weed seeds in your garden next spring.
3. Plowing and Turning the Soil

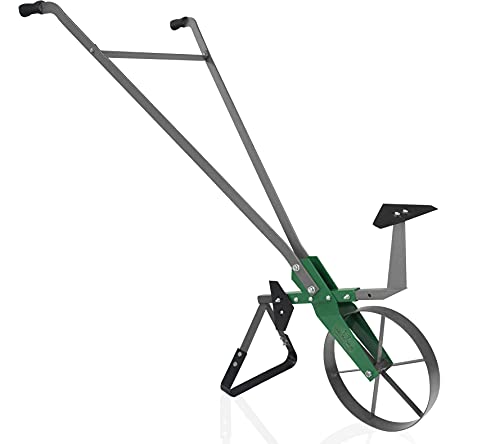
You must take care of good ol’ Mother Earth. Plough under your garden that is directly on the ground and turn over your garden box soil. Add well-rotted horse, cow, or chicken manure, gypsum, peat moss, garden food, grass clippings, and tree leaves, and turn under. You can purchase bagged manure at your garden shop if you do not use natural manure. Turn the soil over again in the spring. Add leaves that have fallen late in November, spreading them on top of your spaded or ploughed smooth soil. Turn it all under in the spring. Relax during December and read all the colourful new seed catalogues for spring.
| # | Preview | Product | Rating | Price | |
|---|---|---|---|---|---|
| 1 |

|
Leafinnerin 15683 Hiller-Furrower Kit for Rear Tine Tillers,Tiller Attachment,Removable, Adjustable... | No ratings yet |
$58.99 |
Buy on Amazon |
| 2 |

|
Varomorus High Wheel Cultivator, Self Cleaning Steel Single Wheel Hoe, Modular Plow Garden Tool for... | No ratings yet |
$149.95 |
Buy on Amazon |
| 3 |

|
MOTOALLIANCE Impact Implements™ Cultivator/Chisel Plow for ATV, UTV, & Lawn/Garden Tractors. Great... | No ratings yet |
$199.99 |
Buy on Amazon |
| 4 |

|
BILT HARD Tiller Cultivator 16 inch, 13.5 Amp 6 Steel Tines Tillers for Gardening Foldable, Electric... | No ratings yet | $159.99 | Buy on Amazon |
| 5 |

|
Hoss Single Wheel Hoe | Cultivate, Weed, Plow and Maintain Your Garden! | No ratings yet | $269.99 | Buy on Amazon |
4. Garden Tools
Bamboo and wood stakes can be stored in their plastic tube bags or tied together with twine for next year. If left out, they will rot through the winter. If some have broken, save them for houseplants or smaller garden plants next year. Store in the garage, garden shed, or anywhere it is dry. If you use twine or pantyhose to tie your plants, vines, and tomatoes, untie them and use them next year. If you used twisty ties—don’t. Throw them out because the metal wire in the paper wrap will eat into your plant stems.
If you have metal tomato cages, stack them and cover them, then store them in a dry place for the winter. They will rust if left outside. If broken, cut that part out and use it for bell peppers or bush green beans.
Remove all the dirt and debris from shovels, rakes, hoes, diggers and hand tools. Clean your pruning shears and lightly oil them. This will keep them from rusting and you have them for years to come. If you use a rotor tiller, clean the blades and body.
5. Don’t Forget to Mow
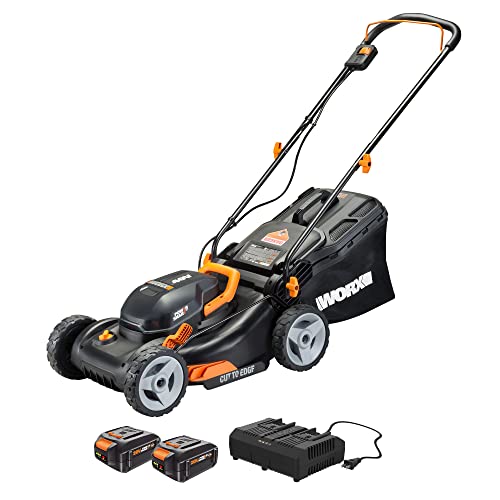
There are many wonderful reasons to mow in the fall to get a head start on healthy growth for your spring grass. Mowing stimulates growth, encourages root growth, keeps the blades standing tall and straight, helps to preserve the lush green colour, and dense grass crowds out those nasty weeds. So that you will have the soft, flourishing, and greenest grass on your side of the fence, be sure your blade is sharp, sharper, and sharpest. If you use the mulching device on your mower, you will have no grass clippings to clean up and bag. When the grass blades are cut off at the top of the blades, the chlorophyll quickly rushes back up to seal the cut!

| # | Preview | Product | Rating | Price | |
|---|---|---|---|---|---|
| 1 |

|
Worx 40V 17" Cordless Lawn Mower for Small Yards, 2-in-1 Battery Lawn Mower Cuts Quiet, Compact &... | No ratings yet |
$265.05 |
Buy on Amazon |
| 2 |

|
Greenworks 40V 16" Cordless (Push) Lawn Mower (75+ Compatible Tools), 4.0Ah Battery and Charger... | No ratings yet |
$209.99 |
Buy on Amazon |
| 3 |

|
Greenworks 2 x 24V 17" Brushless Cordless (Push) Lawn Mower + Blower (320 CFM) + 12" String Trimmer,... | No ratings yet |
$499.99 |
Buy on Amazon |
| 4 |

|
Greenworks 40V 21" Brushless Cordless (Smart Pace / Self-Propelled) Lawn Mower (75+ Compatible... | No ratings yet |
$529.99 |
Buy on Amazon |
| 5 |

|
BLACK+DECKER Lawn Mower, Corded, 13-Amp, 20-Inch (MM2000) | No ratings yet | $263.36 | Buy on Amazon |
| 6 |

|
BLACK+DECKER Combination String Trimmer, Lawn Mower, and Edger, Cordless 3-in-1 (MTC220) | 10,790 Reviews | Buy on Amazon | |
| 7 |

|
Little Tikes Gas 'n Go Mower Kids Toys for Toddlers Boys Girls Age 18 Months and Older, Indoor... | No ratings yet |
$25.97 |
Buy on Amazon |
You probably don’t have headlights on your mower (don’t you wish?) for mowing in the late evening. Don’t ever cut your grass in the middle of the day. Why? Because when you cut the grass, the tunnels to the roots are exposed abruptly to the surface wind and the heat of the day. With evening mowing, the winds have calmed down, and the sun is low, making it more comfortable for your grass and you.
If you live in an area that has high humidity and a high dew point, morning mowing will be later while you wait for the grass to dry. Never mow grass when it is wet. The grass will build up on your mower blade and the undercarriage. When we mow when the grass is wet, it tends to tear rather than cut sharply. Tearing and pulling of the blades weaken the grass blades. This can possibly damage the roots. Your grass will be dense when it’s cut at the proper height. Each variety has its own cutting height.
| Variety | Height | Mow at Existing Height |
| Kentucky Bluegrass | 2-inches | 3-inches tall |
| Fine Fescue | 2-inches | 3-inches tall |
| Tall Turf Fescue | 2-inches | 3-inches tall |
| Perennial Ryegrass | 2-inches | 3-inches tall |
| Zoysia | 1 to 2-inches | 1-1/2 to 3-inches |
Never give your grass a close shave. It hurts its ability to maintain itself. It will eventually thin your grass.
Have a happy and prosperous fall season enjoying the results of your efforts now and in the spring.


