An uneven yard is an eyesore and a safety hazard. Unfortunately, parts of your lawn may sink over time due to natural or unnatural causes, like soil settlement, drainage problems, underground pipe leakage and pest-inflicted root structure disturbance. However, how to level a yard like a pro, with holes and bumps with basic lawn maintenance know-how and the proper equipment.
Table Of Contents
How to Level a Yard Like a Pro – Preparing for the Job

1. Ready with Essential Lawn Tools
This how to level a yard on a slope involves lots of elbow grease, but these tools and materials will make your life easier:
- Sand
- Topsoil
- Compost (optional)
- Lawnmower
- Lawn edger
- Shovel, trowel or spade
- Rake
- Bucket
- Garden cart or wheelbarrow
- Push broom
- Garden hose or sprinklers
- Dethatcher (optional)
- Lawn roller (optional)
- Grass seed
Regarding the equipment, rent anything you don’t own to save money. You may have to relevel your yard occasionally, but shopping for expensive, bulky machines you’ll need seasonally is impractical.
2. Clear All Debris in the yard
Clutter can hide lumpy and bumpy areas, so ensure your yard’s surface is free of visual obstructions like leaves, rocks and sticks. To make sure how to level a yard, Cut the grass to analyze your work area more effectively. Avoid scalping your lawn, though — trimming it too short can expose grass blade stems, causing them to dry out. This way, you can have a better look at your outdoor space and identify what needs work.
3. Determine the Degree of Unevenness
Landscapers categorize land unevenness into mild, moderate and severe. Mild cases have shallow depressions and bumps across the yard, with the lowest and highest spots less than 1 inch deep or high. Moderate incidents mean the depth of holes and the height of lumps are anywhere from 1 to 3 inches. Severe situations have low and high spots exceeding 3 inches in depth or height.
Understand how bad the situation is to know whether to do it yourself or hire a landscape professional. Most homeowners can handle mild cases of land unevenness. Moderate ones are still doable but more laborious. Severe incidents are generally too complicated for DIYers, so leaving them to professionals is wise.
The unevenness becomes more of a challenge when sloped land is involved. Mild inclines of 10°-20° are typically perfectly safe to take care of on your own, but steeper conditions may require specialized equipment.
More advanced mowers can be operated remotely at up to 50° slopes, allowing for safer maintenance.
4. Remove Thick Thatch

Dethatching matters to understand how your lawn looks and ensure your grass’s long-term health. It’s the same as raking leaves whenever fall rolls around, except you need to go deeper through the soil to reach the mat-like layers of undecomposed organic materials beneath the grass.
A convex rake is the best tool for the job, but leaf, garden and power rakes are effective alternatives. Dethatching machine rentals are available if necessary.
5. Wet the Ground fully
Adding moisture to the soil aids the leveling process. Otherwise, you’ll find the ground harder to work with. Eco-friendly irrigation solutions such as soaker hoses and drip systems may be inefficient for this job, so rethink your watering options to moisten your yard faster.
6. Mark Holes and Lumps
Want to make sure you don’t miss a spot? Use spray paint, stakes or flags to note the problem areas.
Leveling Mild or Moderate Unevenness
1. Shovel Bumps
Level lumps using a shovel until their surfaces are as flat as the rest of the ground. This is very important step in level a uneven yard quick.
2. Create a Topdressing Mix
Make a mixture of equal parts topsoil and sand. The latter facilitates drainage and aeration, which are vital in grass growth. Combining sand with soil promises excellent results, particularly in areas with clay soil.
Clay and sand will compact without topsoil, so make a topdressing mix even if it slows the leveling process. Alternatively, consider adding 20% compost into the equation — either makes an excellent soil mix. Blend all materials well in a wheelbarrow or bucket to quickly move the batch across the yard.
The beauty of introducing compost into the mix is the nutrients, which fertilize the soil and enhance its moisture absorption. Store-bought compost contains harmful herbicidal chemicals, so think twice about using it.
3. Fill Holes With the Mixture
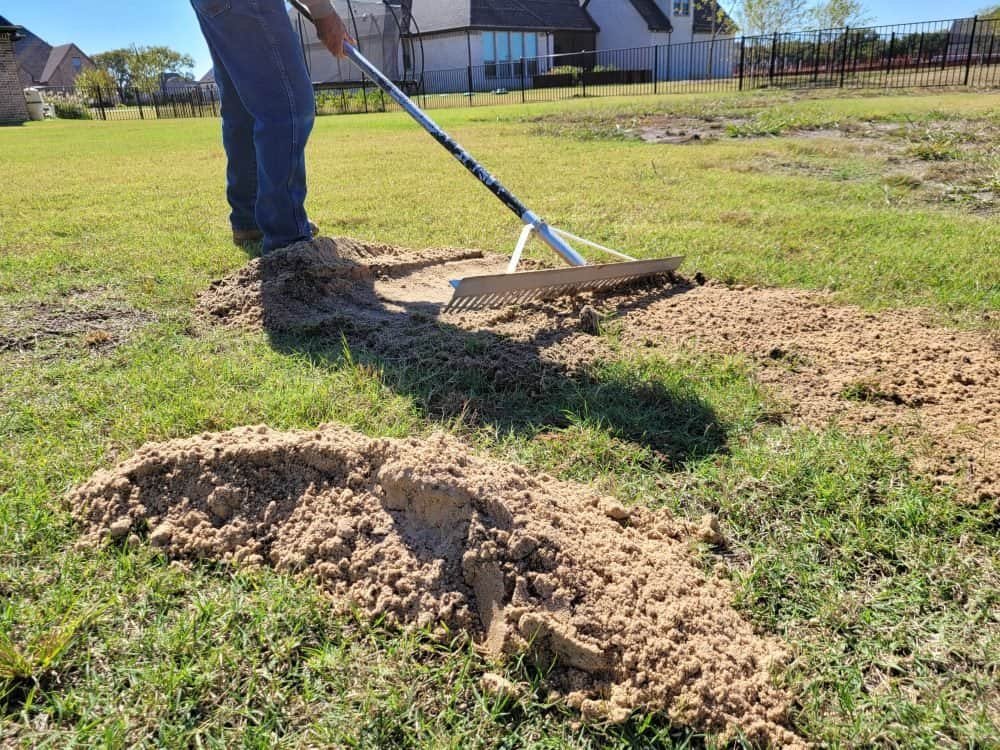
Topdressing the low areas with no more than ½ inch of the leveling mix is a solid practice. Applying just the right amount keeps the grass from getting smothered, so spread the mixture evenly with a rake.
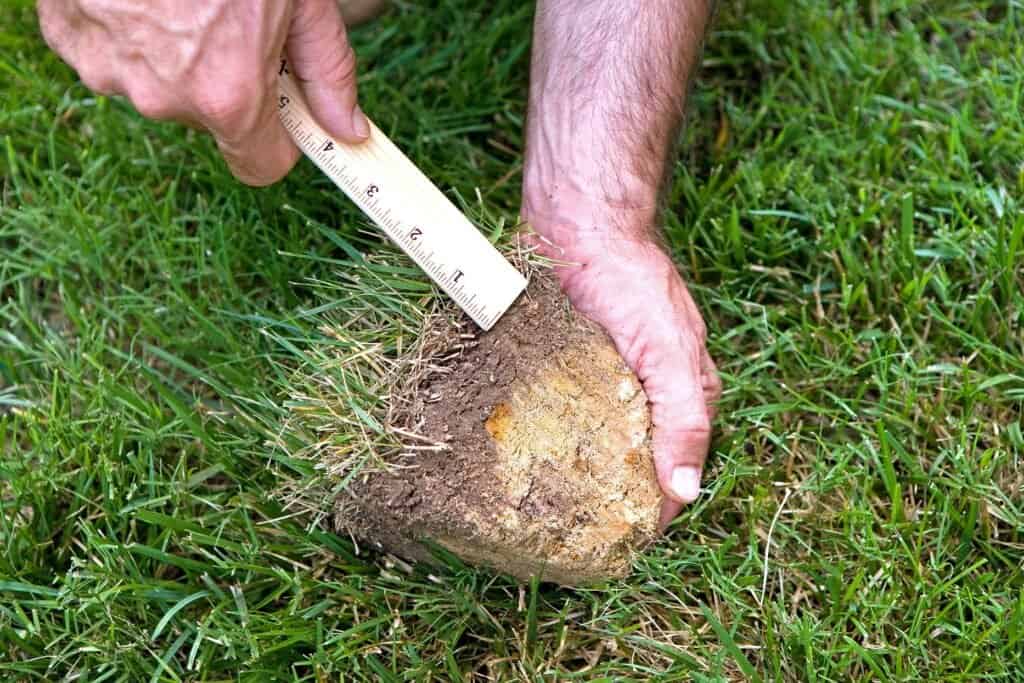
When dealing with deeper sunken areas, dig up the sod first. Cut through the target area with a lawn edger. Then, put the shovel’s blade outside the low spot, slide it up to 3 inches down and scoop up the grass without damaging its roots. Put the topdressing mix into the hole, slightly water it as you go and put the grass back into place.
Consider compacting the subsoil to eliminate air pockets and prevent future settling. If you think running a lawn roller is overkill, walk on it. Afterward, add topsoil and plant grass seeds.
4. Brush the Grass

Using a push broom to brush the grass back and forth can help the grass breathe. Work the soil mix down and lift the grass blades. Stop only when the area matches your lawn’s surrounding contours.
5. Spread Grass Seed
Did the leveling process leave some areas bald? Lay new sod or sow grass seed in refilled areas. Read the instructions on the package to do it right.
6. Water the Grass
A quick shower nourishes grass. Letting it drink after being removed from the ground can help it recover from such an ordeal.
7. Watch Out for Standing Water
Monitoring your lawn for weeks is essential to ensure everything is finally even. Redo the process if you notice puddles when you water it. You may need to reapply the topdressing mix multiple times. Add more when the grass grows or you can no longer see the initial mix.
Enjoy the Sight of an Even Yard
Hope you got better understanding on how to level a yard, and Leveling rough terrain can be taxing, but you’ll reap what you sow. As long as you follow these tips, you can boost your home’s curb appeal and eliminate outdoor hazards in no time.


